Below is a guest post from my friend Andy Weiss, who is experimenting with repairing cast iron pots. -dg
History of cast iron cooking utensils
Modern cast iron does not have a machined cooking surface. Before the 1950s, it was standard practice to machine the cooking surface flat. Additionally, finer sand sand used in the casting process produced a smoother surface.
At the time, major manufacturers such as Griswold (example here) and Wagner (example here) machined and refined their cooking utensils, which are why products are valued by today’s collectors and chefs.
In 1965, separating molding machines reduced casting and labor costs, but casting, which was not practical to machining smooth machines, left with much more coarser finishes. Also, using Teflon made the market so expensive it was flooded with cheaper products, driving the market from premium machined cast iron cooking utensils.
The lodge was one of America’s last major cast iron producers (my frying pans are both lodge products), and modernising the process in the 50s and 60s replaced the hand-made produce with automatic molding. Machined processing was no longer effective, and by the 70s the lodges no longer offered sophisticated cooking surfaces, making them unable to cook pebble-like cast surfaces that challenge the season.
In the ’70s, Griswold, Wagner and Atlanta Stoves were either closed or bought by someone else. By this time, no one had produced machined cast iron.
The lodge sold seasonal cast iron with carnauba wax coating until 2002, and now “pre-season” products with soybean oil.
Today we have companies like Butter Pat Industries (founded in 2013 – now acquired by Yeti). It uses precision casting techniques to produce sophisticated finishes, with companies such as Field Company (founded in 2016), Sumita Ironware (founded in 2015), and Finex (founded in 2012) selling cast iron and polished cooking surfaces.
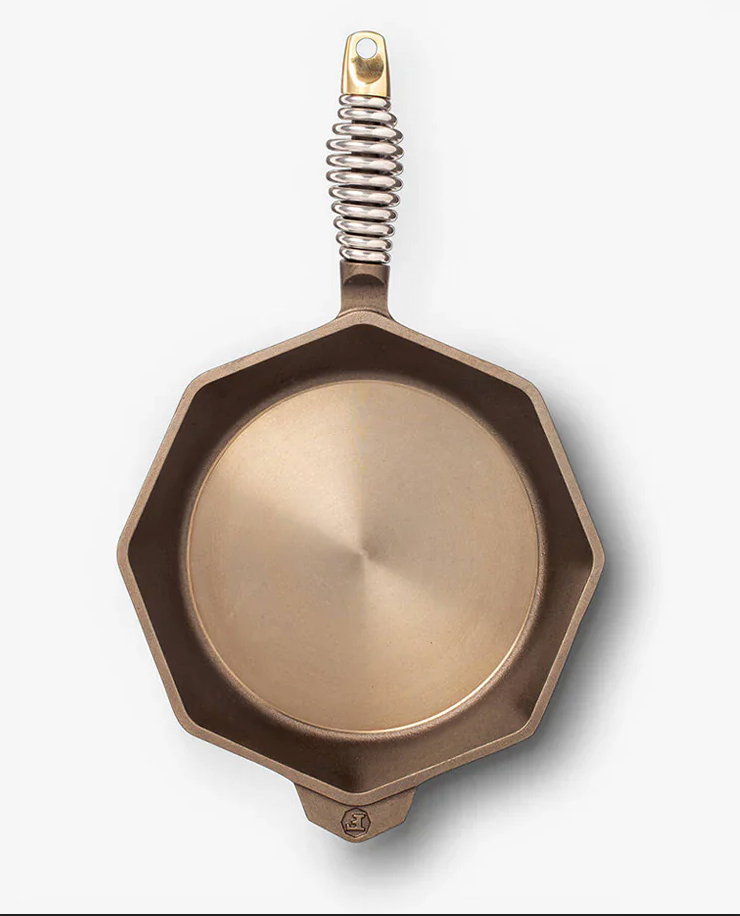
Modern Finex 10 inch cast iron frying pan
A month ago, I had no idea about history or the new boutique companies producing high quality cast iron cooking utensils.
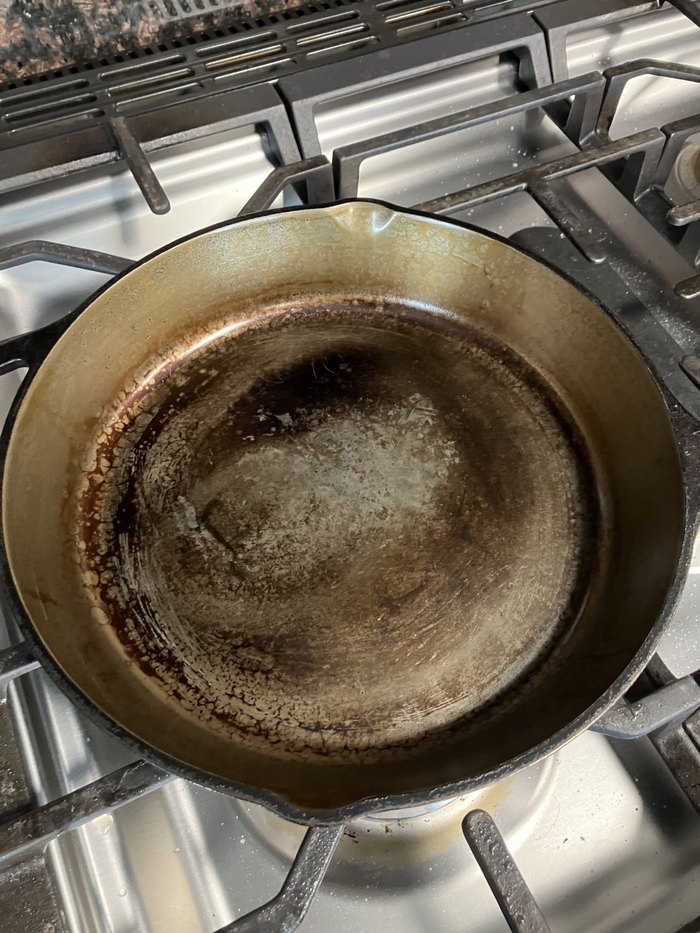
However, I had two inexpensive lodge cast iron pots, whose typical rough surface was attributed to the fighting casting process. Can you make them better?
Experiments in repairing cast iron
Ten years ago, my boss grew a new cast iron skillet by hand as a gift for his wife. He worked on it at lunchtime and spent a year honing it.
At the time I thought it was a labor of love rather than a real thing…and YouTube’s algorithm gave me a video about machining and polishing cast iron.
I decided to start with a small pot.
I have no plans, but I have tried a lot. I tried a dremel tool with a small stone to remove the factory seasonings (using the seasonings on top of them). And I tried it on hand with some sharpening stones (my old boss technique). Rather than making any real progress, I was surprised that it caused more damage to the surface and left the gouges. I also tried sandpaper, then sanded the blocks, then used a medium orbital sander in the range of 60 to 180 grit.
Overall, I must have been in the bread for over 20 hours before I got tired of working on it.
There are CNC metal lathes, M-head bridge port mills, and several different welding machines. Cast iron is new to me, and I worked in the garage and enjoyed feeling the new material.
After polishing, I applied a thin coat of avocado oil and seasoned the pot by upside down in a 400F oven for several hours. A portion of the aluminum foil was in the rack below to catch the dripping (this is a seasoning technique I found on the web that works well).
I was hoping for the bread to be better, but I didn’t expect to get anything that felt like an oil glass, but that’s what I got. After some uses, this perfect finish is gone, but it’s much better so there’s no need to polish it anymore.
Orbital Thunder for Victory
I was very inspirational and started polishing the big pot, buying a few more intermediate grit discs for the orbital sander.
Approximately 80% of the work was placed on a flat bottom, with about 20% on both sides. 60 Grit Media removed the seasoning and started the polishing process.
The grits had sharp edges, leaving each new sanding media with a matte finish. I flatten the bottom until I polish the entire bottom, then I do the same on the sides and then finish with the bottom again. Because as the media wears down, when the dull edges of the sanding media polish the metal, it remains from a matte finish of fine scratches to a slightly shiny finish.
The next step then acquires fine grit and repeats the process and moves to a new disk.
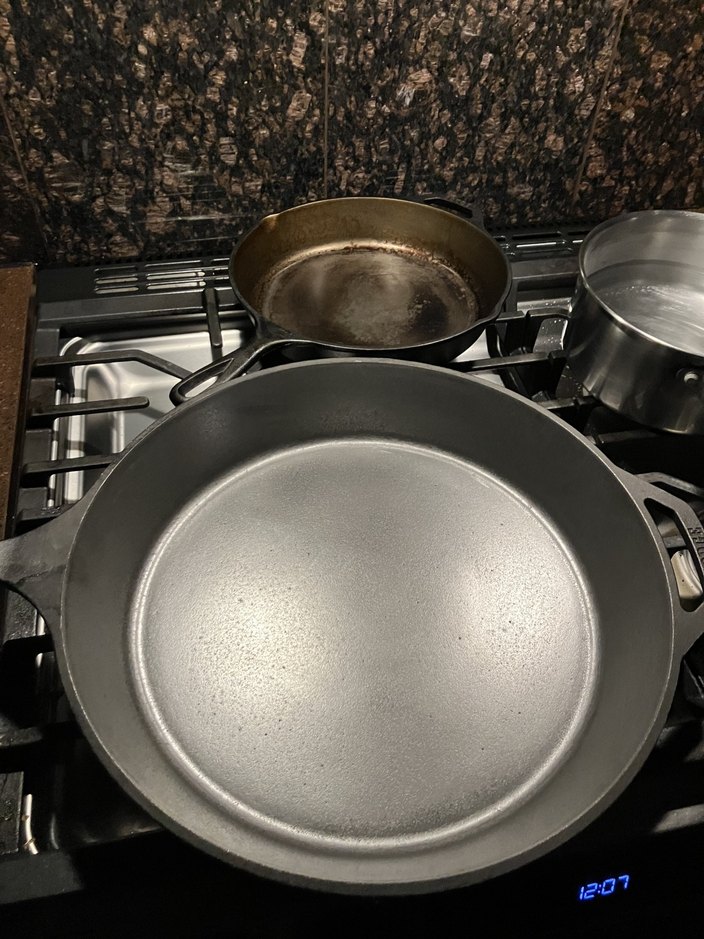
Big Pan took 23 minutes. It got faster and seasoned as well.
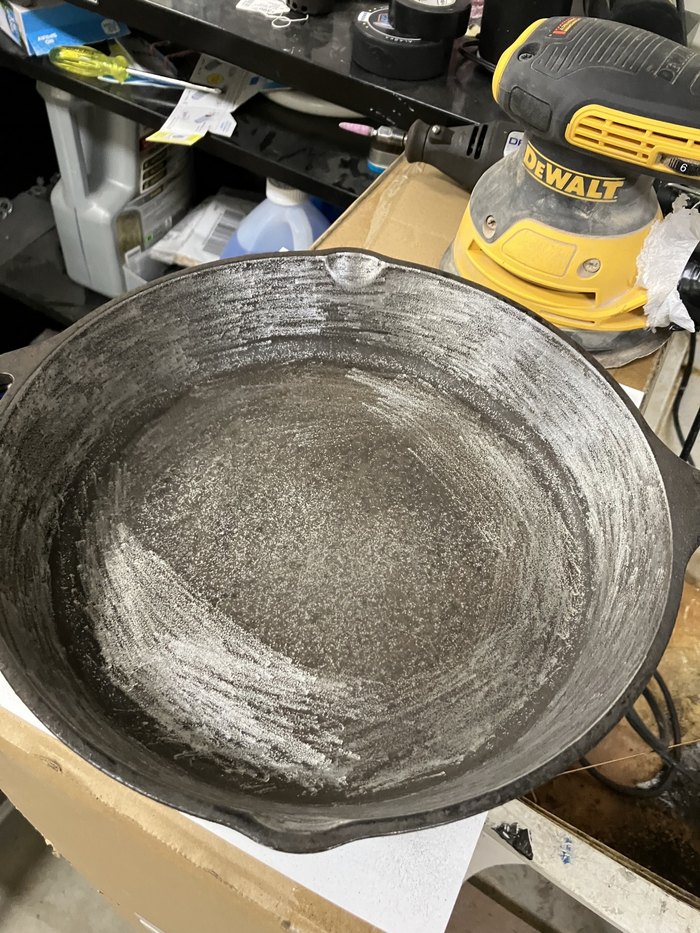
Below is a small bread after the first seasoning. You can see the stone gouge, but you can’t feel it. The grilled oil finish leaves a smooth surface.
This is a small pot I worked on gouged with a dremel tool just before I started orbital sanding. Orbital Thunder is the way to go.
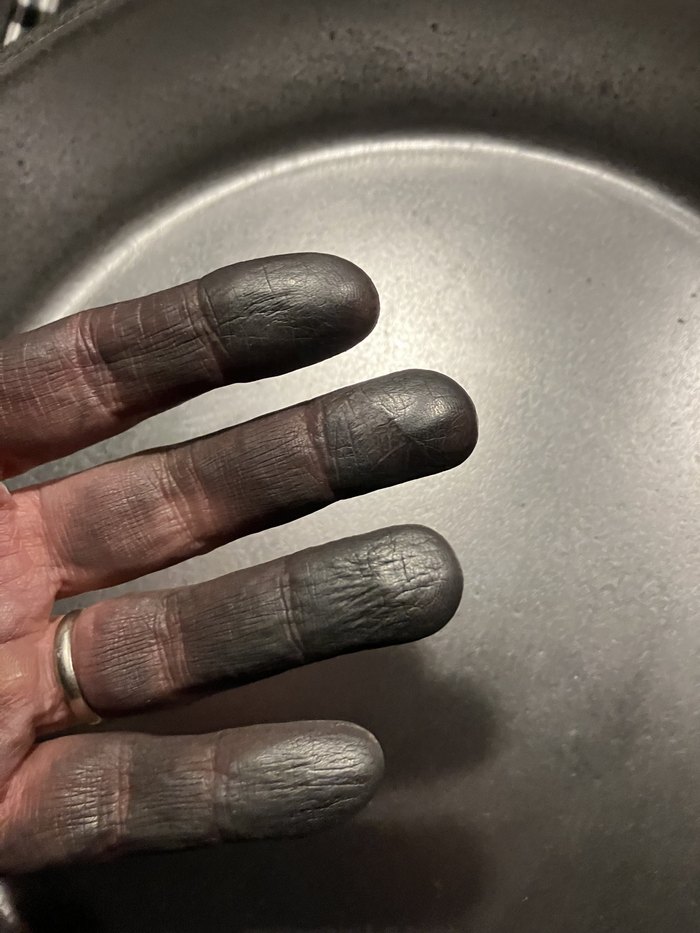
You will get dirty, but the metal will easily disappear with a little soap.
I had a magnet in my garage and was coated with the same dust. The dust was very fine and the orbital sander filter (and I changed it to fit in the pot) didn’t catch any particles. Cast iron dust is much finer than sawdust. I’m pleased that there are no floppy disk drives anywhere within 100 feet of this project.
This features a 23-minute big pan and six sanding discs later. It’s on the way to seasoning (it’s PM, on a stove watch):
And the “polished” surfaces are not perfect, they are from (it’s nickel for reference).
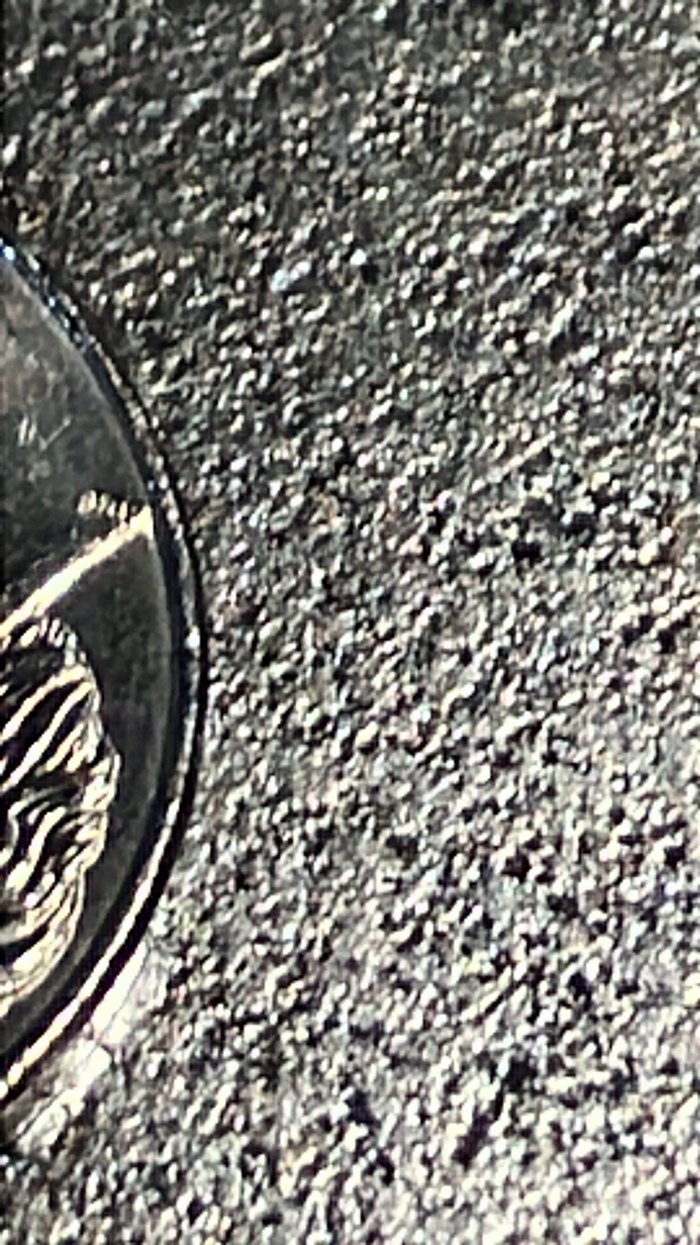
In this:
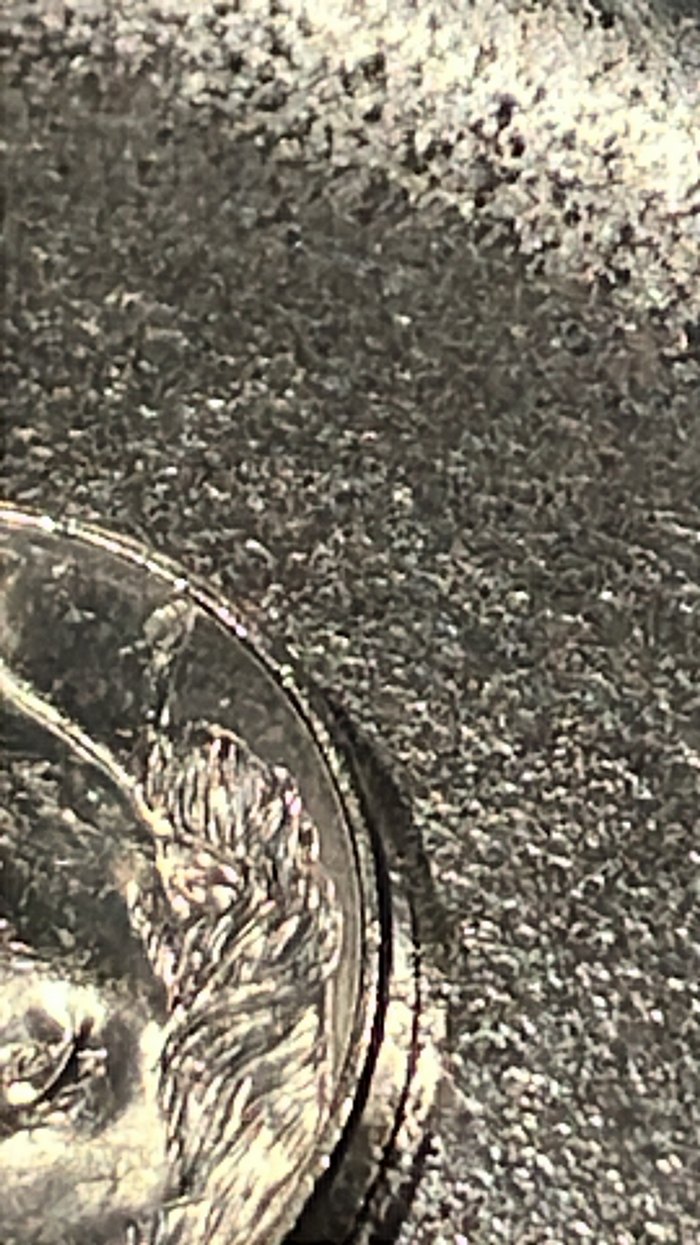
What I found was that the seasonings cover many variations on the surface. You don’t need to perfect it, you need to season it better.
That’s my first post about what I did and how I did it.
I will follow this post and will be happy to answer any questions you may post in the comments.