Cyanotypes are historical ways to use the power of the sun to create prints. Doing on a sunny afternoon is a very fun craft, and you can create beautiful prints thanks to what’s growing in your garden. This is how you can make your own sunscreen card!
There are many ways to collect and preserve beauty from your garden, but one of my favorites is to create greeting cards using cyanotype printing, a historic photography method (you can read more about the history of this post).
I first used this method to create a sunprint napkin and was excited by the results. I was engrossed in the possibilities of interesting shapes in the garden that need to be immortalized.
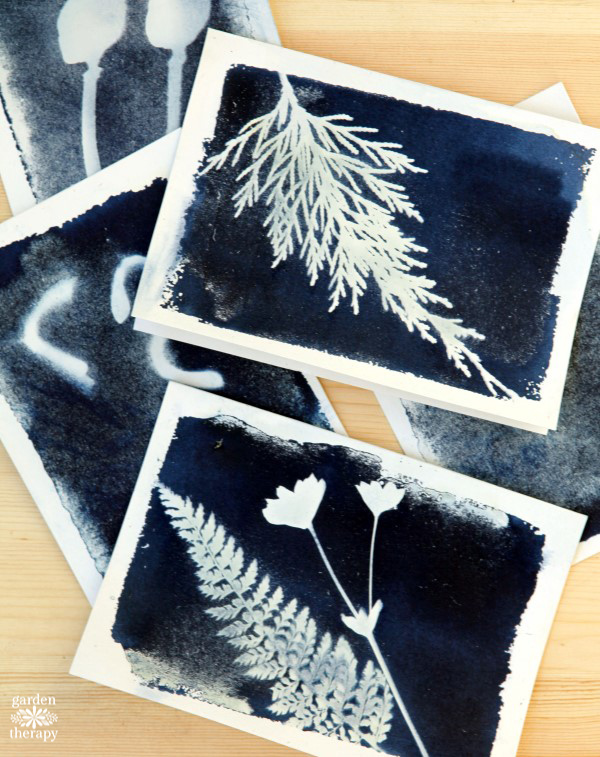
I used some of the remaining cyanotype solutions from the project to create lots of sunprint cards showing the different leaves in my garden. Let’s show you how to make it yourself!
How to make a Sunprint card
Choose a sunny day and work on your cyanotype card. You will need less than 30 minutes of sunlight to make a print, but you will need to dry it out too, so take this into consideration.
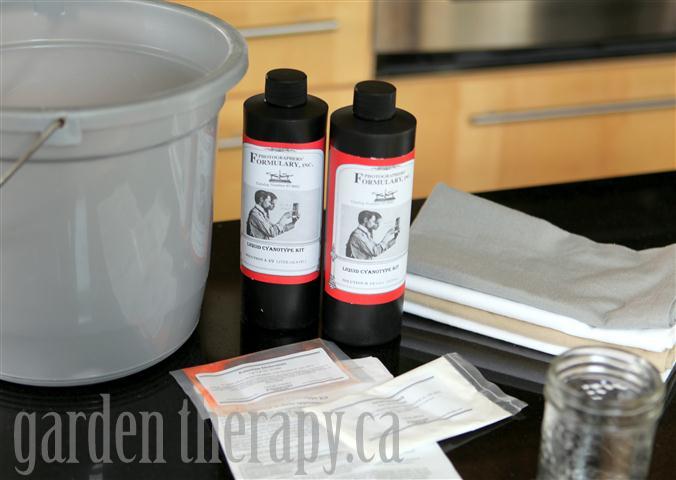
material
Make it
Read the instructions (several times!) in the kit (several times!) to learn the process. Since we deal with chemicals, make sure everything is prepared and ready in advance. Wear gloves, lay out newspapers, and protect your work surface.
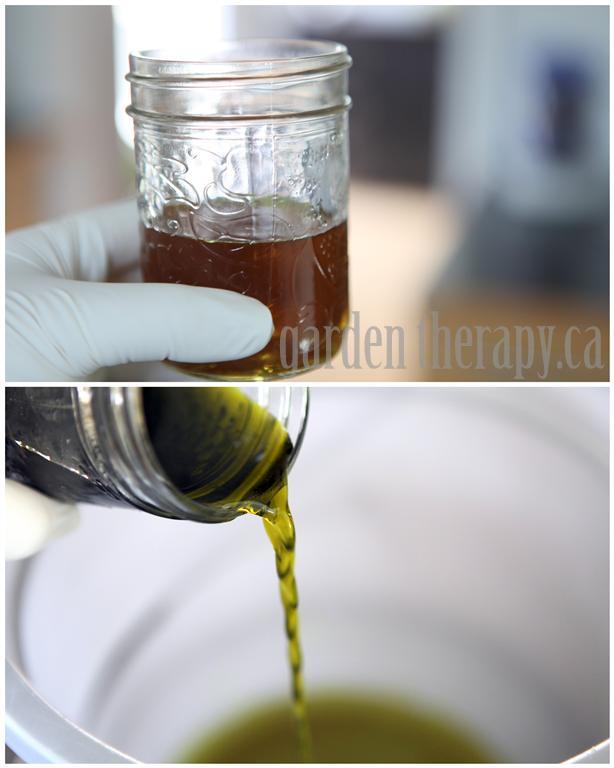
Mix Solution A and Solution B as stated in the manual. Pour the mixing solution into a plastic bucket to make the rollers easier.
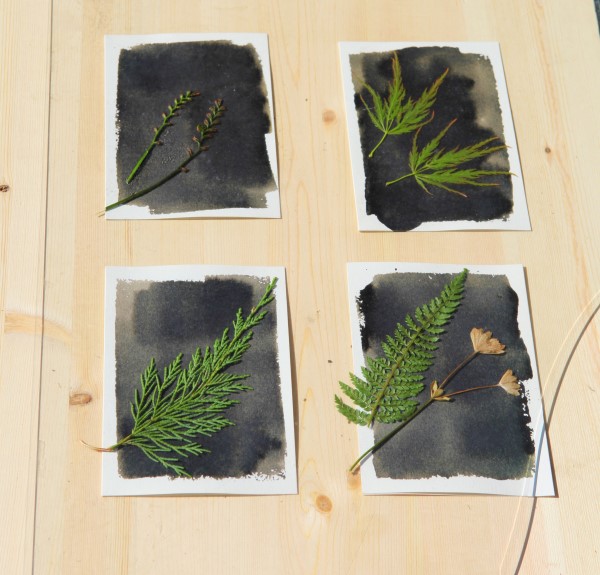
Use a small foam roller to create a rough rectangle on the card. Like torn paper, I like the edges that look uneven and natural.
Choose from a garden, park or forest, a few flat ones of interesting shapes. Flat leaves with plenty of detail seem to work best. Round objects leave shadows and do not give crunchy sunscreen.
Once the solution is dry, place the plants on the prepared curd. NOTE: According to the package instructions, any light will begin the exposure process, so follow the package instructions to ensure that the solution is completely dry in the dark. Place a piece of glass on top of the card, leave and leave in direct sunlight for 20 minutes without being disturbed.
If you don’t want to deal with chemical application, you can also buy tanned paper. It’s on my list.
Once the exposure time has increased, run the print under the water until it starts to occur.
The instructions say they should wash for 5 minutes, but I found this to lighten the print. I also tried to float the entire card in the water tub, but these results weren’t washed away too much.
There was a warning instruction that if the chemicals were not washed thoroughly, the print would remain exposed. I did these cards a few weeks ago and they’re still perfect so I think I’ve found the right balance. My experiments made me feel satisfied with the running water system.
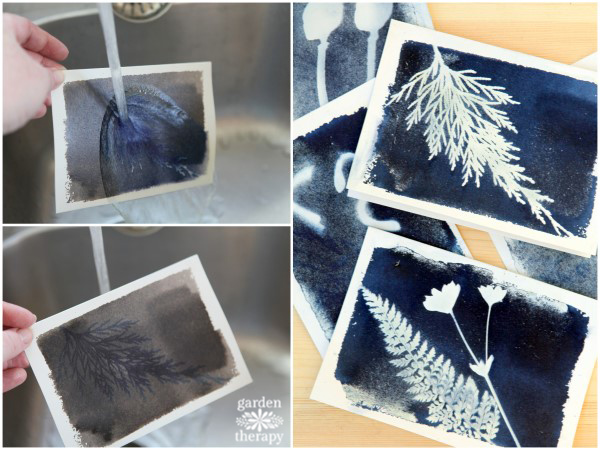
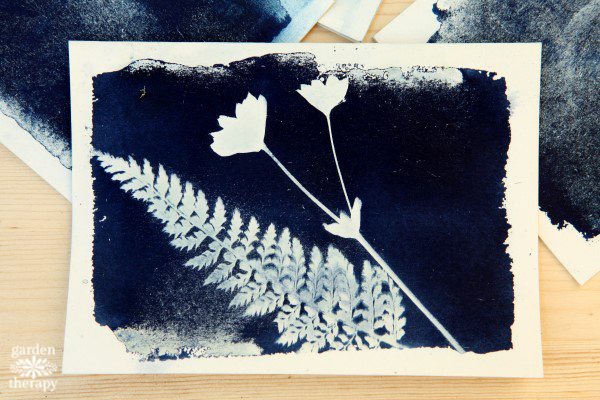
There is no need to wash the exposed area under the leaves until it is completely white. Dry until moistened, then press between sheets of parchment in the phone book to make sure the cards are flat again.
I’ve had a lot of different types of organic ingredients I found in my garden, but the most successful ones were flat leaves and flowers. I stroked the heads of some poppy seeds casting shadows and distorted the print. As nature is abundant, I am sure you have a lot of choices, as I did.
When you’re done, wash everything really well. You, your bucket, and any spills should be cleaned with a large amount of warm water.
Cyano Type Card FAQ
I used cardstock for me. The printer paper is too thin as it needs to be washed under water, but the cardstock was just the right thickness and smoothness.
These prints can fade a little faster than other ink prints. However, this fade occurs over time. I’ve been holding their energy for months!
More ways to preserve your garden
With a city girl who learned to garden, it changed everything. Author, artist, master gardener. A better life through plants.