Everything you need to know to store fresh produce in your freezer and pantry
Image: Shutterstock
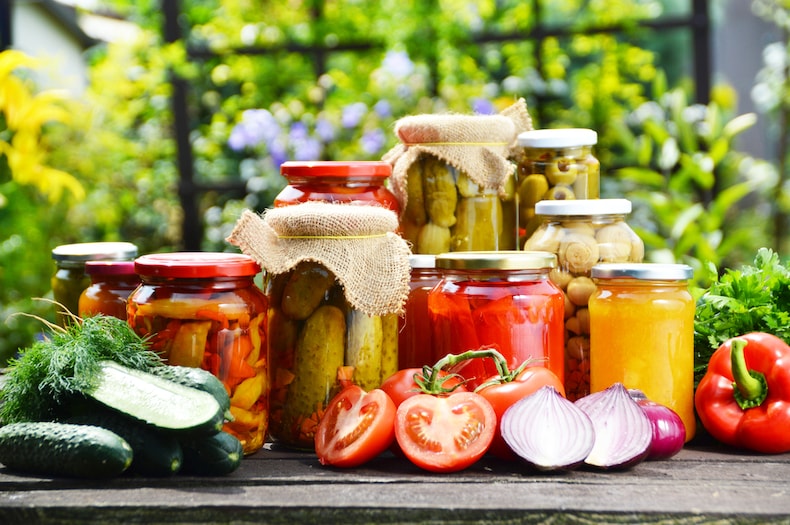
Preserving seasonal produce is a great way to deal with excess stock, eat healthily and become self-sufficient. Here are five ways to make the most of your fruit and vegetable seedlings by storing surpluses for the future.
From freezing to pickling, drying to jarring, we’ll show you the basics of each method—and ask some of your favorite bloggers for handy tips—so preserving is not only easy and fun, it’s guaranteed to make your winter meals that much tastier.
Basic facilities for storing home-grown produce

Sterilised glass jars are essential for storing jams, chutneys, pickles and more.
Image: 5 second Studio/Shutterstock
Luckily, you don’t need any special equipment to preserve fruits and vegetables. In fact, most of what you need is something you probably already have. Here are some items to make the job a little easier.
Saucepan – A large saucepan is essential for jam making. If you plan on making a large batch, a jam pan is a good investment. Jam pans are designed to prevent the sugar from burning and make it easier to pour the hot liquid. A jam thermometer is the most accurate way to gauge the temperature at which your jam will set. A ladle or slotted spoon – whatever you have on hand will do. When canning or pickling, always sterilize your equipment before use. A funnel – makes it easier to fill bottles or jars. A dehydrator is a great investment if you plan on drying large quantities of food. Otherwise, an oven will do. Stock up on plenty of Ziploc bags for the freezer, as well as sterilized jars for jams, chutneys, and pickles. Use mason jars and a pot lifter when removing them from the water bath.
1. Freezing

Sarah from Craft Invaders likes to freeze the fruit she collects with her kids.
Image: Craft Invaders
Freezing is probably the easiest way to deal with leftover food. Most people own freezers and can easily store bagged fruits and vegetables, as well as homemade “prepared meals” that can be cooked now and stored to eat later.
You can freeze almost anything, but remember that water expands as it freezes, destroying cell walls. The higher the water content of what you freeze, the more watery it will be when thawed. Raspberries and blackberries will lose their shape when thawed, but that’s no reason not to freeze them. Use them in your morning smoothie or fruit crumble.
Try freezing cooked spinach in ice cube trays to add to soups and stews, puree tomatoes to add to sauces, and bag up leftover peas, beans, cauliflower, and carrots to enjoy later in the year. Most vegetables can be frozen with little to no processing other than slicing or cutting into bite-sized chunks, but any vegetables you plan to freeze should be washed thoroughly under running water first.
Consider blanching vegetables (immerse in boiling water for 1-5 minutes) before freezing, which is believed to preserve flavor, color and texture and reduce loss of vitamin content. Drain and dry vegetables thoroughly and place in Ziploc bags in the freezer.
Frozen vegetables will last for 8 to 12 months, depending on your freezer, but they will deteriorate over time. Throw out any that have lots of ice crystals, have shrunk, or are discolored. Also, trust your nose and toss them in the trash if they smell odd.
2. Canned or bottled

Karen Barnes Booth uses a water bath to preserve tomatoes, usually called bottling in the UK.
Image: Lavender and Lovage
From the name, you can imagine that you need tin cans to can food, but in fact, canning (or bottling) refers to the process of heat treating and bottling pickles in a mixture of vinegar, salt and spices. To make this process go smoothly, you need some preparations. Here’s what you’ll need:
Mason jar Large pot Tea towel Oven gloves Funnel Ladle/slotted spoon
Before you begin, make sure all your jars and utensils are clean and sterilised. We recommend putting everything through the dishwasher or washing it thoroughly in hot, soapy water before sterilising. To sterilise mason jars, bring a large pan of water to the boil and submerge the jars for a few minutes. If you can’t do that, place the jars in a gas mark 2 or 140-150C oven for 10 minutes before use. Sterilise utensils just before you need them, and place clean jars on a tea towel to catch any spills.
Whether you’re canning a rich tomato sauce or freshly picked vegetables, follow the recipe you use closely and precisely. When you’re ready, pack the jars, leaving a half-inch of space at the top for a vacuum. Wipe off any excess vinegar from the threads and necks of the jars with a paper towel soaked in pickling vinegar. The jars must be perfectly clean to keep a tight seal. Then screw the lids on, until you feel it, but don’t screw them on too tight. The gas needs to escape so that a vacuum can form in the jars while they cool.
Place the jars in a large pot of boiling water so that at least an inch is completely submerged. Leave a few inches between each jar to allow the heat to penetrate the contents. Boil for the time recommended in the canning recipe you’re using. If in doubt, boil a little longer to be safe. Using a pot lifter or tongs, remove the jars and place on a tea towel or cooling rack, then leave to sit for 12 to 24 hours.
Once cooled, you should be able to remove the metal ring from the mason jar and lift just the lid. This will ensure the seal is tight. Then label and store in a cupboard. Unopened cans will last for 12-18 months. Once opened, place in the refrigerator immediately and consume within a few days.
3. Pickling

Chocolate pickled carrots are even better at Tin & Thyme
Image: Tin & Thyme
There are two main techniques involved here, and it’s important to know which is which: so-called “quick pickles” refer to pickles made for the refrigerator, which are made fresh and are intended to be used within a few weeks.
The second technique uses a process called lactic acid fermentation, which is how fresh vegetables are transformed into jarred, gut-friendly sauerkraut and kimchi that are hailed for their health benefits. Stored properly in the fridge, they can last up to six months. For us, this is the best reason to make them, because they’re full of healthy bacteria and taste delicious. And the best part is, anyone can try it.
Quick Pickle:
You will need sterilized mason jars, pickling vinegar, and the pickling spices you want to use to season your vegetables. To make crispy pickles, fill the jars with coarsely chopped vegetables and pour in the vinegar, leaving space at the top so that the pickles are completely covered. Then screw the lids on tightly and place the jars in the refrigerator. Pickles can be eaten immediately, but the flavor will mature over time. Pickles made this way should be consumed within three days to one month. Always follow the recipe and discard at any sign of deterioration.
Lactic acid fermentation:
This method involves preserving produce in a saltwater brine, which encourages the growth of good bacteria and inhibits the growth of bad bacteria. Again, when making sauerkraut or kimchi, it’s very important to follow the recipe closely.
First, wash and chop your vegetables, then put them in your fermentation container or pot. In another bowl, make a brine with salt and water and pour it in until the vegetables are completely covered. Then take a cock weight (a weighted lid that sits inside the container) and crush the contents to make sure they are submerged in water during fermentation. Then put the main lid on and place it in a cool, dark place, such as your garage.
Once fermentation has begun, check every 3 days. You may notice some mold growing on the surface of the liquid, which is usually fine – just skim it off. Fermentation lasts 2-6 weeks and is done when it stops bubbling. The longer it ferments, the more sour it will become, so taste it and eat when you’re happy with the taste. Once fermentation is complete, transfer the pickles to small sterilized jars. They can be stored in the refrigerator for several months.
4. Drying and dehydration

Kev from An English Homestead loves drying fresh fruit as a snack for his kids.
Image: British farmhouse
Drying preserves foods by removing much of the moisture and prevents the growth of bacteria and fungi. Herbs are particularly well suited to drying because they don’t freeze well: just hang them in a warm, dry place until the leaves are crisp, then peel them from the stems and place them in sterilized jars.
Use the oven to dry fruits such as apples, plums and pears. They make a great trail mix or morning muesli topping. Wash, dry and slice the fruit and arrange them in a single layer on a baking tray. Bake at a low temperature until the fruit has a leathery texture. After cutting with a knife, check the blade for any water droplets, if there are any allow them to dry a little more before storing in a clean airtight container. Vegetables should be brittle, like potato chips, and break easily.
If you want to take it a step further, grind up dried veggies in a food processor to create a powder. At Veg Plotting, Michelle makes a flavorful garlic powder for speedy meal prep. Dried veggies lend themselves to this process, adding a powerful, nutritious punch to home-cooked meals.
If you don’t want to waste time running your oven all day, you could also buy a dehydrator, which uses a heater and airflow to remove moisture from produce before storing it. The manufacturer’s instructions should tell you how long it takes to dry different fruits and vegetables. Read our full article on how to dry fresh produce for more advice.
5. Syrups and cordials

A splash of Kate’s fig leaf syrup livens up the Prosecco and adds flavour to the salad dressing.
Image: Diary of a Country Girl
Syrups are quick and easy to make and can be used to flavor drinks, salad dressings, ice cream sundaes, or mixed into Greek yogurt. The most basic way to make syrup is to bring a large pot of water to a boil with sugar and chopped fruit (or other ingredients). Simmer the mixture for about 10 minutes, or until reduced and thickened. Then strain through a strainer or grind in a processor. The syrup can be poured warm over pancakes, or chilled and stored in the refrigerator for up to a week. It will stay delicious for several months if you freeze it in small portions.
Storing produce for future consumption is a great way to enjoy delicious home-grown fruits and vegetables all year round. It’s also fun, rewarding, and a great way to save money on grocery shopping. For more tips on how to preserve tomatoes or how to preserve apples, check out our blog. And if you’re looking to keep your pantry full for winter, we’ve found eight of the best chutney recipes to get you started right away.
Since publishing its first seed catalogue in 1855, Thompson & Morgan has grown to become the UK’s largest mail order seed and plant company. Through publishing its catalogues and running an award-winning website, Thompson & Morgan is able to provide home gardeners with the best quality products money can buy.
Related articles recommended for you