Use this tutorial to make a simple bee house for the bees that nest in the trees in your garden. Using leftover untreated 2x4s, it’s an eco-friendly way to help native bees.
We also provide free birdhouse designs for birds such as great tits, wrens and bluebirds.
About Bee House

Have you ever wondered what a beehive is for? A good beehive provides a safe place for bees to lay their eggs – the next generation of honeybees.
In nature, wood-nesting and cavity-nesting bees use materials such as hollow plant stems or rotting tree stumps to lay their eggs.
Natural materials such as dead wood and decaying matter are essential for an eco-friendly garden, but beehives may also be useful.
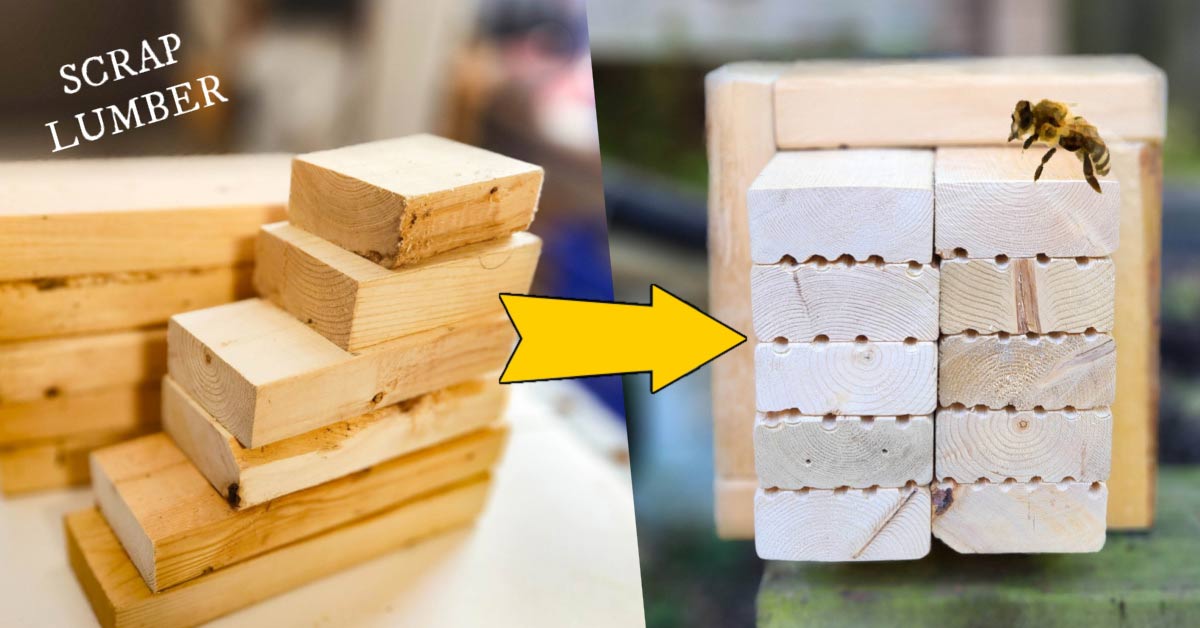
I made this simple beehive out of scraps of untreated 2×4 lumber that were destined for the landfill. It’s a shame to see scraps of wood end up in the landfill so I like to reuse as much as I can.
This design is a little different from other beehives for two important reasons.
The tunnel (hole) is fully accessible so it can be sanded down to a smooth surface during construction, and the frame can be easily removed to access the tunnel for maintenance.
We have a lot of “tunnel bees” in our garden – they currently spend a lot of their time drilling holes in the wooden walls of our patio and shed, but we’ve found the holes to be too shallow for nesting so we’re hoping this house will provide another option.
If you decide to take on a project like this, keep in mind that it’s not something you can set up and forget about. Like bird feeders and nesting boxes, beehives require regular maintenance and cleaning. The goal is to help native bees by not spreading parasites, mites, and disease.
I had a house similar to this a few years ago and it was well used so I’m interested to see what happens with this one.
Build a bee house
I will show you how to make this beehive.
Consumables and Materials
This is what I used, adjust it for what you have.
(10) Untreated 2x4x7 inch scraps of wood for the tunnel pieces (4) Untreated 2x4x9 inch scraps of wood for the frame (18) 2.5 inch deck screws Tools: electric drill (Amazon), 1/4 inch drill bit, 1/32 drill bit, saw, sander, vice, hangers or long deck screws for attaching to a fence or wall
Use untreated waste materials
It starts with a scrap of preservative-free wood, I used a 2×4 piece of spruce wood.

Choose your layout and cut the wood to size
The next photo steps forward in the process and shows the layout I chose for my beehive.
For the tunnel pieces, I used 10 pieces of 2x4x7 inch wood (2 rows of 5 blocks each). These pieces should be longer than the depth of the tunnel you excavated.
Bees will not use tunnels that are open on both ends, nor will they use tunnels that are too shallow (less than 2-3 inches). My drill bit reached a depth of about 4 inches.
The frame is made from (4) additional 2x4s cut to size to fit around the tunnel blocks. Do not build the frame until all of the tunnel blocks are prepared. Dimensions will vary with sanding and assembly.


Drill holes
The actual beehive hole (the drilled hole) is made between two pieces of wood, which allows it to be taken apart and sanded down now and cleaned later.
To drill the holes, line up the two pieces in a vice and drill the holes where they meet.
I used a 1/4 inch drill bit and drilled each hole as deep as the bit could reach.

Creating Registration Marks
After drilling each set of tunnels, line up the drilled sections with the tunnels and make alignment marks. Make marks on the ends that you didn’t drill, as these will be hidden by the frame later.
I named each piece of wood (A, B, C, D, E for the first row, F, G, H, I, J for the second row) and after drilling each hole I drew two lines to help me align the wood so the tunnels lined up again.
In the next picture, can you see the G and F pieces and the lines drawn? That’s what I mean. Next, I marked G and H. Next, I marked H and I.

All about sand
I used an orbital sander (Amazon) to smooth out the edges, remove any sharp bits of wood, and make the tunnel nice and smooth.

Building the frame
The beehive is secured in place with 2.5 inch screws.
First, create a frame using some salvaged 2x4s to wrap the tunnel pieces around.
Lay the pieces of wood in position, mark the desired cut lines and cut each piece to the exact size you need.
Secure with two screws in each corner.
Even with the frame in place the blocks still wobbled slightly, to fix this I added one screw through the frame to each tunnel block.

Make a Hanger (Optional)
Decide how you want to hang the unit on a fence or wall.
I made a hanger using wire, washers and wood screws, as pictured below.
For a secure fit, pre-drill holes and run long screws at an angle through the frame and into the fence.

Hanging beehives in your garden
It is generally recommended to hang your bee hives 3 to 5 feet above the ground in a semi-shaded location.
Again, make sure it is securely fastened and doesn’t wiggle or wobble.

maintenance
As mentioned above, all artificial (man-made) wildlife feeders, houses and nesting boxes require regular maintenance to ensure they are safe and beneficial.
The Xerces.org article in the resources section below provides some maintenance tips.
If you feel your bee hives are not contributing to the health of your garden, remove them.
We hope your bees enjoy their new nursery.
resource
Is my garden part of a healthy ecosystem?
The goals are:
Healthy soil, air and water free of pollutants, herbicides and pesticides. Plants that provide food and habitat (living and decaying) for local wildlife as part of a wider eco-corridor. Renewable, sustainable and climate-smart properties, including carbon sequestration, natural water filtration and management.
For more ecological gardening tips, click here.
eco friendly gardening books
These books are recommended for gardening enthusiasts as they will inspire them about ecological gardening and the amazing relationships between plants and animals. Our future is in our hands!
1. Pollinator-Victory Gardens | Kim Eierman | Winning the Battle Against Pollinator Declines with Ecological Gardening; Attracting and Supporting Bees, Beetles, Butterflies, Bats, and Other Pollinators
2 Gardening for Bees: Creating Habitats for Native Pollinators: Ontario and Great Lakes Edition | Lorraine Johnson, Sheila Cora | All the information gardeners need to take action to support and protect pollinators by creating habitat in their yards, community spaces, balconies and boulevards, anywhere!
3 A Gardener’s Guide to Native Plants of the Southern Great Lakes Region | Rick Gray and Shawn Booth | All the essential information for growing 150 native plants worth planting in your garden, all in one easy-to-read guide.
4 Bringing Nature Home: How to Sustain Wildlife with Native Plants | Doug Tallamy
5 garden helpers: insects, birds and other animals that keep your garden beautiful and thriving | Frederique Lavoipierre
6. The Humane Gardener: Growing Backyard Habitats for Wildlife (How to create sustainable, ethical gardens that promote native wildlife, plants, and biodiversity) | Nancy Lawson
~Melissa Queen of Earth ♛